Veed IO Tutorial: Simplify Video Editing with VEED [2023]
What is VEED IO?
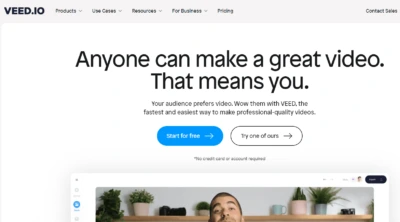
VEED IO simplifies the process to create professional-looking videos. Unlike most video editing software, VEED does not require a steep learning curve or expensive, complex software. VEED IO allows easy video creation, offering impressive results. Best of all, it’s done online, accessible from any device, anytime. Let’s get started.
You may also be interested in Veed IO alternatives
- AI video makers ⏺Pictory AI ⏺Synthesia IO ⏺ Steve AI ⏺ Biteable ⏺Lumen ⏺Invideo ⏺Animoto
- Video editors ⏺ Topaz ⏺ Flixier⏺Moovly ⏺ Steve AI ⏺Wisecut ⏺ HitPaw Video Converter
Table of Contents
What are the Features of VEED IO?
VEED provides a range of user-friendly features, including:
- Recording, cutting, and editing videos
- Adding effects, audio, and transitions
- Exporting and sharing videos
- Efficient project organization with folders
- AI tools such as automatic subtitles, drag-and-drop elements, templates
- Brand Kit for adding a custom font, color, audio, video, and images used by businesses
- Collaboration with team members to create videos together
VEED’s video editor also offers advanced features like:
- Settings menu: Allows changing the size or aspect ratio of the video and manipulating the video duration and background.
- Media tab: Enables adding additional video footage to the project.
- Audio tab: Helps in adding or recording audio files.
- Subtitles: Enables generating automatic subtitles using AI software.
- Text tab: Gives access to a variety of text styles and animation options.
- Elements tab: Allows adding custom shapes, images, emojis, progress bars, and animated sound waves.
- Transitions: Connects video clips together with smooth animated effects.
- Filters tab: Adds color grading or video effects to the footage.
- Draw feature: Allows manually sketching anything on top of videos.
- Support team: reachable via the help icon to resolve any issues
How to Get Started with VEED IO?
To begin, users can sign up for a free basic license with VEED. However, more features can be unlocked through different packages available in both annual and monthly payment plans.
Once signed up and logged in, users are directed to the VEED workspace, a comprehensive content creation suite. The workspace allows you to record videos, utilize templates, live stream, and manage projects and files.
Create New Projects
VEED offers multiple ways to start a new project. Users can upload a pre-recorded file, start with a blank canvas, or record a video directly with their webcam. VEED also provides access to preloaded elements from the Brand Kit, Dropbox, or directly from YouTube. The platform also gives users access to the VEED stock footage and audio library.
Another option is to use one of the hundreds of templates VEED offers, which come in various styles, categories, and themes.
Video Editor Tools
Once a video file is uploaded, it appears in the video timeline, where all the video elements can be managed. The playhead can be moved to view the timeline content, and the elements can be rearranged as needed.
The video editor includes tools for uploading additional media, splitting clips, adjusting audio levels, zooming in and out of the timeline, fitting the timeline to the screen, and showing sound waves on clips.
Mastering Video Editing with VEED
Step 1: How to Cut & Trim (Basic Edits)
Video editing is a significant part of creating engaging and professional content. Below are the steps to make basic edits in a video:
- Identify the portion of the video you wish to cut out. Place the play head at the start of the mistake and click “Split”. This action divides the footage into two parts.
- Next, locate the end of the mistake, and hit the “Split” button again. This process isolates the error in its own unique clip.
- To delete this section, select it and hit the delete key on the keyboard.
- To close the blank space left in the timeline, either add more footage or drag the remaining clips together.
- Trimming footage off the start and end of a clip is useful for removing any dead air. Simply click and drag the element to trim it.
- Zoom tools are handy for making precise cuts. If a mistake occurs, use the undo tool to revert the action.
Step 2: How to Incorporate Additional Footage
To make your video more interesting and engaging, consider adding additional footage:
- Click on “Add Media” to upload a file, record a new video, or add stock footage.
- To rearrange multiple clips in the timeline, click and drag them around.
- Cut and trim these added clips to your desired length.
- To overlay footage (like a voiceover while showing other footage), simply stack the footage in layers.
Step 3: How to Add Effects with Transitions and Filters
Adding transitions, filters, and effects can significantly improve the storytelling and production value of videos:
- To add a transition, drag and drop it from the “Transitions” tab to the timeline, placing it between the clips.
- Video filters can alter the look and feel of your footage. Select a clip to apply a filter and then choose from various color grading options.
- To manually adjust the look of your footage, select the “Adjust” tab to rotate clips, color correct, or alter the speed of your footage.
Step 4: How to Add Text and Visual Elements
On-screen text and visual elements can enhance your video’s production quality and provide context:
- To add text, select a style from the “Text” tab, customize it, and position it within your frame.
- Other elements like shapes, emojis, images, animated progress bars, and sound waves can be added from the “Elements” tab.
- The “Draw” tab offers a pen tool to draw or highlight elements in your footage.
- To add a custom image, go to “Media” > “Upload a File” and open an image from your computer.
Step 5: How to Add Subtitles and Transcriptions to Your Video
Subtitles can enhance understanding and improve your videos’ performance on social media:
- To add subtitles, select the “Subtitles” tab, choose “Automatic Subtitles”, and select the video you want to transcribe.
- Select the language spoken within the video and then click “Create Subtitles”.
- The software will transcribe the audio into text and add it as subtitles to your video.
The process of transcribing a video is straightforward with VEED. After the video is transcribed, you will find:
- The transcript in the Edit window.
- Subtitle text boxes appearing in the timeline.
You can manually customize the subtitles, correct errors, and even translate the subtitles into other languages. Some of the customization options include:
- Font selection.
- Text size adjustment.
- Subtitle style modification.
There are also preset styles that can be applied to all subtitles with a single click.
Subtitles can be placed where you want them on the screen by clicking and dragging. Adjust when they appear and disappear by moving elements in the timeline. The transcription can also be downloaded in a subtitle file format of your choice.
Step 6: How to Add Music and Edit Audio
VEED provides an intuitive audio editing experience. You can add music or audio to your projects with just a few clicks. The platform allows you to:
- Upload your own audio.
- Record a voiceover.
- Access a stock audio library.
Upon adding an audio file to your timeline, you can adjust the volume, mute certain clips, use AI tools to enhance the audio quality and manage the speed and duration of the audio.
Step 7: How to Collaborate and Share Video
VEED’s platform encourages collaborative editing and seamless exporting. You can invite others to collaborate on your project by adding their email addresses. When you are ready to export your video, select your preferred export preset and ensure that your subtitles are turned on if you have added them. Once the video is rendered, you can review it and make further edits if needed. VEED also gives you control over your video’s privacy settings and sharing options, including embedding your video on other websites.
Step 8: How to Organize and Share Your Video
VEED allows you to organize your projects in a user-friendly workspace. You can sort your past projects into folders for easy access.
Sharing videos online can vary based on the intended destination. Platforms like TikTok require vertical videos, whereas others may require different dimensions.
Step 9: How to Reize Videos & Use Templates
VEED allows you to adjust the size of your video projects even after editing. It also offers a variety of templates, providing a good starting point for your videos. These templates can be customized to fit your needs and provide an excellent opportunity to practice and enhance your editing skills.
Conclusion
VEED offers a wide range of tools and features to make the video editing process intuitive and collaborative. It’s a comprehensive platform for creating professional-looking videos for various purposes.
![Jasper AI Pricing & In-Depth Reviews [Updated Guide May 2023]](https://sophiazimmermann.com/wp-content/uploads/2023/05/Jasper-AI-Pricing-768x362.webp)
![Wisecut AI Video Editor Review [2023]](https://sophiazimmermann.com/wp-content/uploads/2023/05/Wisecut-Wisecuts-Wise-cuts.webp)


![40+ Best AI Music Generator & AI Music Tools [May 2023]](https://sophiazimmermann.com/wp-content/uploads/2023/04/Best-ai-music-generaator.webp)
![Soundful AI Music Generator: In-Depth Review & Pricing [May 2023]](https://sophiazimmermann.com/wp-content/uploads/2023/05/Soundful-AI-Music-Tools.webp)